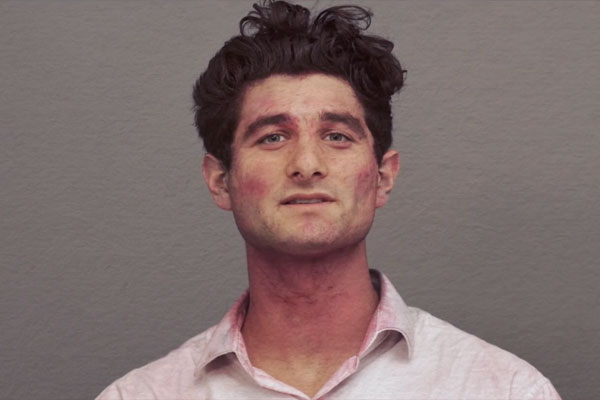
My apologies for the last post as it has been a very busy past few weeks! I just finished working on a couple of commercials/corporate ads, directed three music videos, and hosted my digital film boot camp this past weekend, among other things. I have some really great material that I will be sharing with you all over the next week or so and wanted to kick off today by highlighting my recent no-budget music video shot on the Lumix GH4…
summer eyes
A few months ago, I was visiting Toronto and decided to shoot a music video for some friends from the indie rock band Midday Swim. They’ve been putting out some really cool music and I’d been looking for a small project to get into while I was in town, so we joined forces and put some resources together to make that happen. Check out the video below:
With no budget at all (other than renting a couple of Zeiss primes since I didn’t bring a full kit), we had to build this idea around our resources to make the most of our time. We didn’t really pitch the idea for the film until a day or two before shooting, and ultimately decided to keep things simple and focus on two main locations – a small photography studio (with gray bikes) and a canyon area . The concept of the film is to contrast the dreary and drab office environment with the more vibrant outside environment. Even though it was an overcast autumn day when we shot the location, we livened it up by introducing some colored powder during the chorus and having the band throw it at each other in slow motion.
Since the tempo of the song is not very fast, we were able to overspeed in the camera (by shooting at 48 fps) and cue the song to 200% of its original speed. This way, when the 48fps footage is slowed down to 50% speed in post, it’s perfectly in sync with the original song. This is a technique often used in music videos to achieve a slow motion effect while still maintaining sync with the singer/band members. This method works very well for many music videos, but in some cases it’s just not possible. I shot another music video last week, a significantly larger production, but even so we still couldn’t pan too much in the camera because the song was already going really fast and there was no way the singers and dancers could keep up with the sped-up version .
In terms of post-production, I edited in FCP X, but without using the multicam timeline. There was so much footage and we shot a lot of clips that had to be manually placed in the timeline, so it would have been faster for me to synchronize everything manually. I went through every last shot (that we were actually going to use) and made a schedule like this:

By stacking the layers like this, I can shave off all the layers at once and delete everything except the clips in the stack that I want to use. It’s a tedious process, but I actually like this way of working because it forces me to make more precise and thoughtful decisions rather than a multi-camera setup, which can result in looser and less intentional editing points . When color is needed, I flatten the entire timeline onto a “track” and export an XML file for DaVinci Resolve. I always recommend flattening your layers so you avoid any translation issues with Da Vinci and you’re working with the cleanest file possible.
As for the color work itself – I wanted to give the office scene a more drab, desaturated and drab look, while boosting the warmth and saturation of the exterior. Unfortunately, the GH4 didn’t perform as well as I expected at 48fps when it came to capturing the fine details of trees outdoors (not to mention that it got noisy even at 800 ISO). So if I were to go back and reshoot these shots, I would consider shooting at a different frame rate to make sure I don’t lose too much detail.
My decluttering process consists of three steps. First, I added textures to all of the office scenes (which were really just static images shot with a blank sheet of paper). I covered it all over the interior to add to the boring and dry look of the environment. I then added some lens flare to start sneaking some color into the interior sequences, while also helping to blend the transitions into the exterior shots. Finally, I ran the entire project through Film Convert (as a single clip) to help everything blend together better.
To me, this is a perfect example of where the GH4 shines. Smaller productions with more specific requirements (whether it’s high frame rates, 4K, etc.) can rely on the GH4 to deliver results that far exceed what you’d expect from a sub-2K camera. That said, you always want to understand its limitations so you can get the best possible results.
Also: I will be posting a very in-depth and lengthy interview in the next few days, filmed with a friend and colleague of mine while we were driving around Los Angeles and conducted with a custom 3 camera car rig Recorded, so check back soon!
For more information about the Midday Swim, visit www.middayswim.com

